Scanning in 2026
Earlier versions of this site included reviews of Nikon’s Coolscan options. Nikon stopped making these devices early this century and eventually discontinued all software support for them by 2023. I’ll deal with the Coolscan LS-5000ED later in this article, as, if you have one, it may still be a viable option.
But first, let’s look at the reason why you want to scan your film, and what your options are.
Why Scan?
It might surprise you to learn that many of us were scanning our film way back in the early 1990’s. By 1980 I had decided that everything I was interested in—music, writing, television, filmmaking, photography, architecture, you name it—would “go digital” at some point.
One reason for that is that duplication in analog forms is destructive while in digital it is not. But more interesting to me and others at the time was the potential for taking analog processes that were not 100% repeatable and turning them into math processes, which were.
While I was already doing some scanning on my own, when I hooked up with Galen Rowell in 1994, I found that he not only had a Photoshop expert on staff, but had starting working with Bill Atkinson (of Apple fame) on getting better prints from his images (which were all slides).
In Galen’s gallery in Emeryville and later in
Yes, I know that some prefer the “analog look.” If that’s you, I’m not sure why you’re still reading this article. It’s unlikely I’ll write anything that’s of use to you.
Because Galen was using top level scans—and typically from a large format internegative of his original slide—and then finessed the data obtained via Photoshop, you can probably guess what the benefits were (besides 100% repeatable prints): the ability to subtly adjust contrast and color as well as improve perceived sharpness.
So let me digress for a moment.
Galen used slide film. The film he used—mostly Velvia once it was well established—had perhaps a six-stop dynamic range with a long roll-off in the shoulder (highlights) and almost none in the toe (darkest areas). Many of the images he took had useful highlight information that, when printed via analog techniques, tended to not show up. Many of the places he loved photographing—the artic and antarctic circles, as well as high altitude—had extremely subtle light colorations and textures, which tended to get downplayed in a straight analog presentation.
Galen used large format internegative transfers for his slides to help address two problems: (1) 35mm slides don’t impress as much on a publication’s light table as do medium format or large format ones; and (2) with some careful exposure tweaking during the internegative process, he was able to “pull out” the highlight information better.
Thus, for Galen (and many of the rest of us) the transition to scanning digitally came almost naturally as an outgrowth of the things that he was trying to accomplish with his output, particularly the large exhibition prints he sold. In the late 90’s, he and Atkinson were deep into fine tuning that process so that it delivered 100% repeatable, and better, results than he could from analog processes.
I personally needed digital scanning in the late 90’s because of my work at Rodale, where I ran one of that company’s magazines and its subsidiary offerings. Rodale did its own scanning, contrast and color management, and did that digitally, partly in order to “lock down” color at the printing press. I set out to—and believe I accomplished despite using 100% recycle paper and organic inks—match National Geographic level of publication, and much of managing that came about because of using analog film (primarily Provia F) as a source to a complete digital process that started with a high-quality scan.
Most of you know how rich and deep Photoshop is these days in terms of its abilities to manage and manipulate images. But that’s always been true. It just gets truer with time. I’d argue that Photoshop is about the most sophisticated (and repeatable, there’s that word again) ways of dealing with images. Thus, it was only natural that most of film users gravitated towards scanning.
Okay, so you want to try that yourself. Where do you start these days?
Current Solutions
A number of consumer-friendly options exist today for scanning.
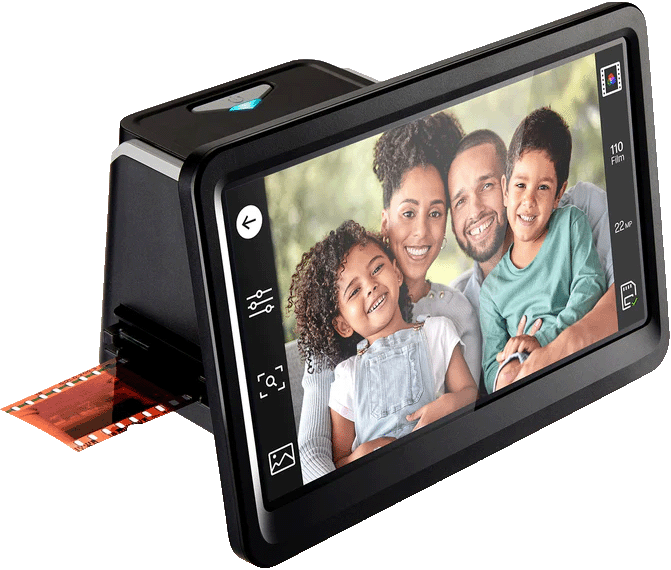
At the top of my list is the HP FS700, a US$260 dedicated film scanner with a 7” touchscreen to control the process and show the results. This unit is simple enough to use, and produces 13mp (4208x3120 pixel) color or black and white images from both negative and slide film. It writes to an SD card and can be connected directly to your computer via USB.
Overall, the HP FS700 has about a +/- two stop EV adjustment range, plus both color and contrast controls, as well. It’s simple enough to use, and while it doesn’t allow a huge range of adjustment, it’s usually enough to get a solid “starting scan” to work with further using digital photo editing software. You can also use it as a 7” slide show display, or use HDMI and display your images on your TV.
A very similar 7” touchscreen scanner is the US$210 Kodak RODFS70. Indeed, it may be sourced from the same OEM supplier as the HP, as the specifications are essentially identical. However, the touch UI and the buttons are a bit different, and the unit comes with a bright yellow Kodak branding.
Slightly lower cost 5” versions of these HP and Kodak units exist, as well, but I’d tend to pick the larger unit, as it makes it a bit easier to see what’s going on in your scan.
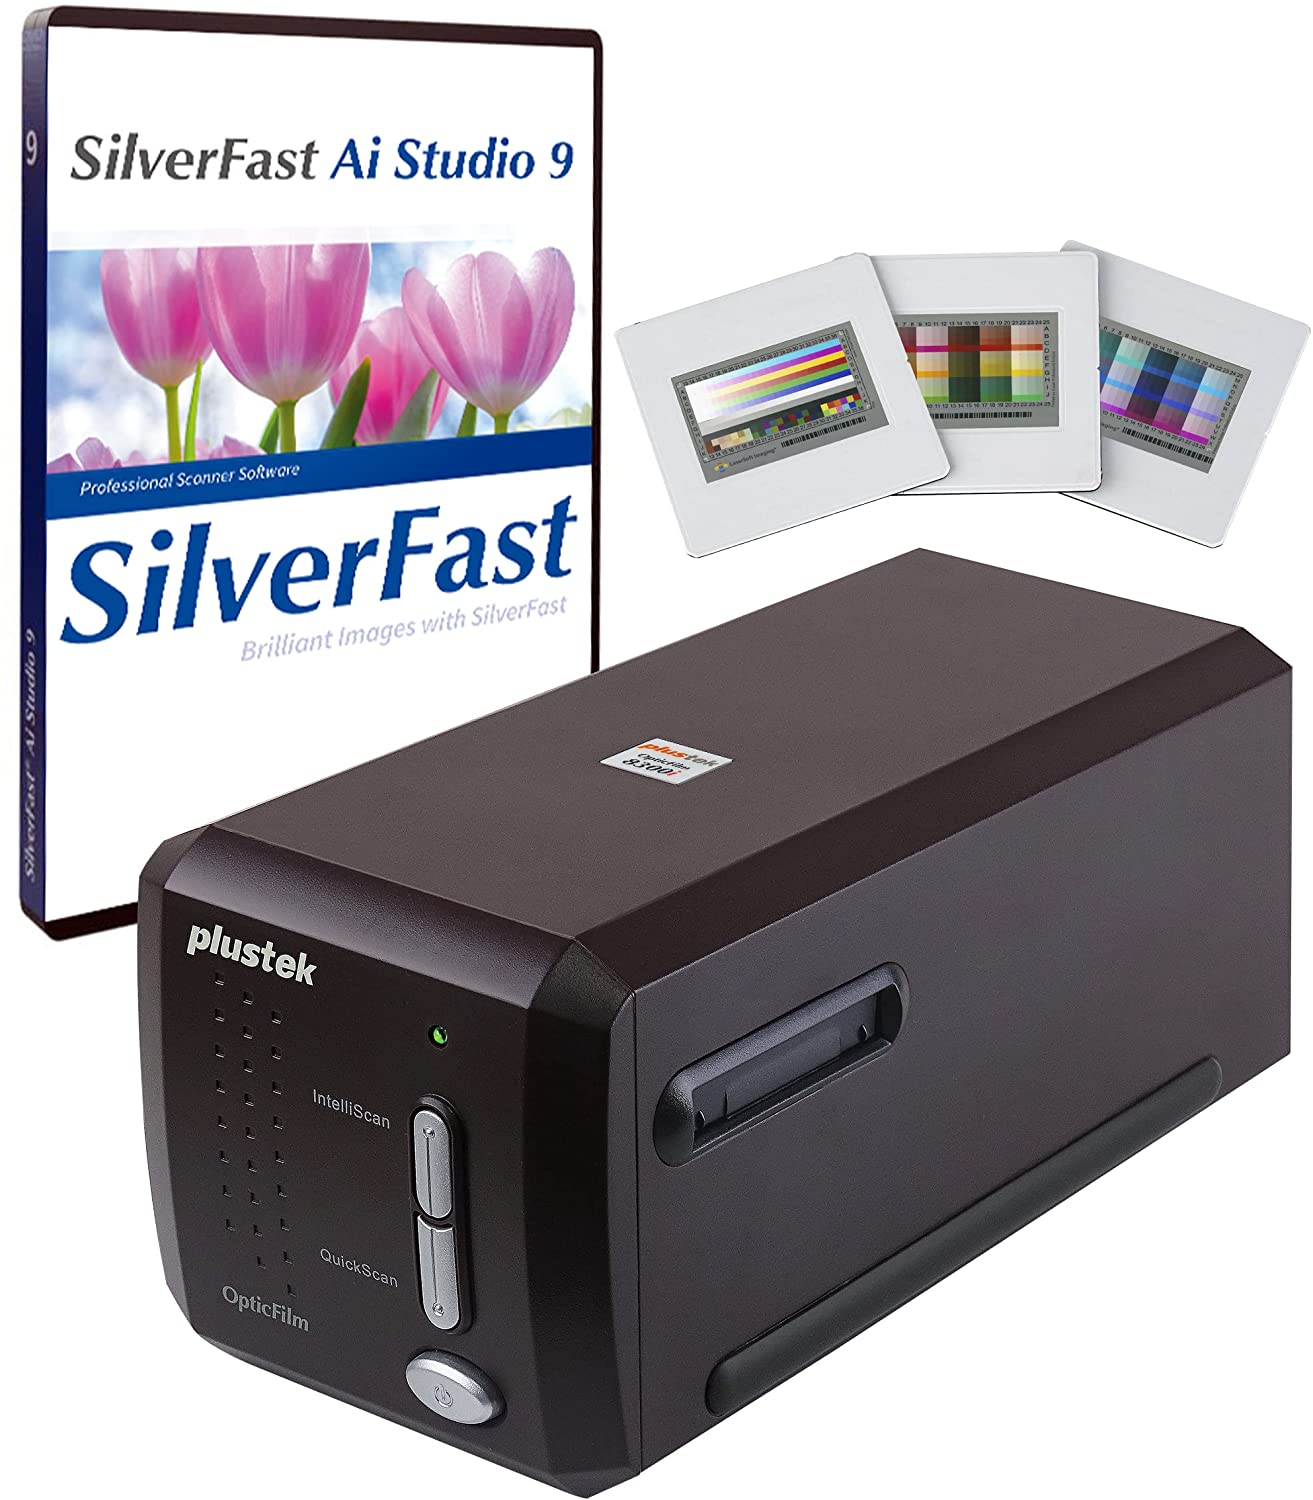
At the high end of what’s available today, you’ll find the US$540 Plustek OpticFilm 8300, which bundles a software product called SilverFast to help you get the best possible scan.
The difference here is that instead of single pass 13mp JPEG images, you can get 16-bit raw images with up to 7200 dpi resolution, and the SilverFast software includes the ability to scan an image multiple times to extract better information from it. It’s slower—think 30-second+ scanning times—but comes with calibration slides and software that is highly sophisticated and allows for a great deal of user control.
The Plustek is probably the current choice for anyone that was using (or wanted to use) a Nikon Coolscan, as it’s less expensive than used Coolscans while coming very close to matching the output.
Nikon Coolscan in 2026
Nikon stopped supporting their desktop Coolscan devices quite some time ago. I’m a Mac user, so I’ll briefly describe how to use an older Coolscan with Macs (Windows users will need to look elsewhere for help). These Nikon Coolscan devices used Firewire 400 and originally required Nikon Scan to work.
That introduces two problems with how to use them today:
- Software — Nikon tended to recommend VueScan after they discontinued their own software, and also pointed to SilverFast. Both are still available today, with VueScan being the less expensive and easier to use option (this is what I currently use). VueScan captures linear DNG files. If you’re using negative film, you’ll need to invert the file in processing (and remove the orange mask) in Photoshop, which is easy enough to do. SilverFast is a geeky and fiddly app, but introduces features that VueScan doesn’t have, including support for their special HDR scanning. If you really wanted to use Nikon’s own software, the problem you have there is finding a copy—Nikon last year removed it from the download Archive—and then you’ll need a Tiger (10.4) or earlier macOS running on a PowerPC processor. It’s sad that Nikon Scan is basically gone now, as it was the most approachable way of scanning, yet had some very advanced functionality.
- Connection — Firewire is being deprecated everywhere, with macOS Tahoe (26.x) no longer supporting it. For previous macOS versions, you’ll need Firewire to Thunderbolt cabling for things to work. That requires at least two dongles, and possibly three: a Firewire 400 to 800 adapter, Apple’s Firewire to Thunderbolt 2 dongle (MD464ZM/A), and then Apple’s Thunderbolt 2 to 3 dongle (A1790) if you’re using a modern Mac.
Hook the cable concoction together between the Coolscan and your Mac. Install the software. Both Vue and SilverFast should be able to find the scanner, as there’s a protocol in use that the software will pick up when everything is connected correctly. From there, it’s just a matter of loading a slide/negative into the Coolscan, then starting the scan in your software. Pay close attention to what file format the software is being created; you don’t want an 8-bit JPEG, you want 16-bit TIFF or DNG if you’re going to do any post processing.